

Map Fields for Knowledge Article Generation in Khoros
The article templates in Khoros are reflected on the Map Fields screen. If you have added or deleted a template in Khoros, click Refresh Template List to view the latest list. The button refreshes the templates list. You can map fields in all the templates, or in only a few of them. To deactivate a template, use the toggle in the Actions column.
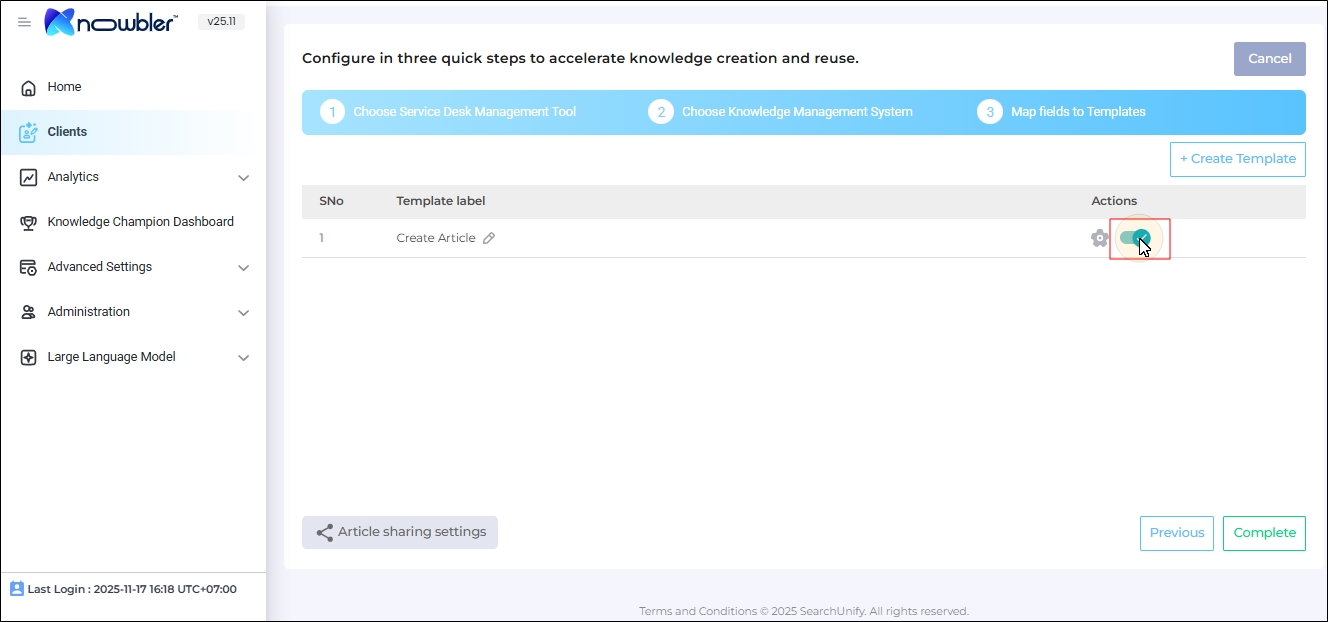
The activated Khoros templates are shown to the agents when they are creating knowledge articles in FreshService.
< image >
To open a template for editing, click in the Actions column.
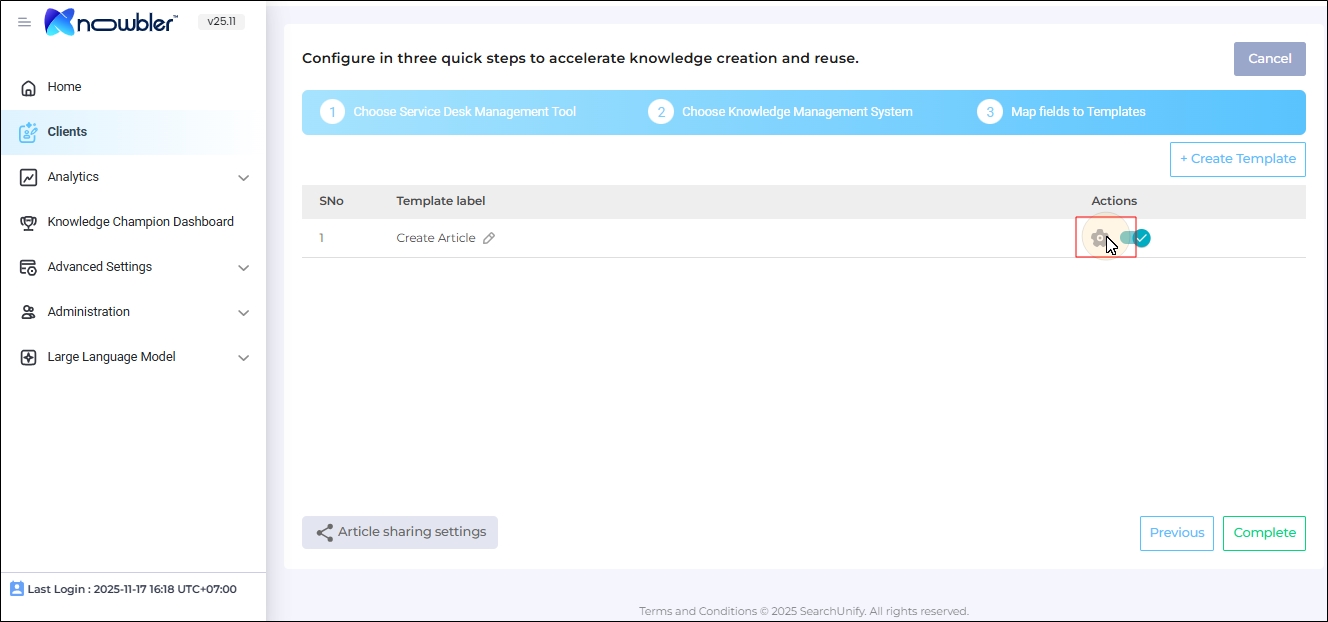
All the mapped fields are displayed. You cannot remove mandatory fields. The custom fields can be removed, but they cannot be mapped.
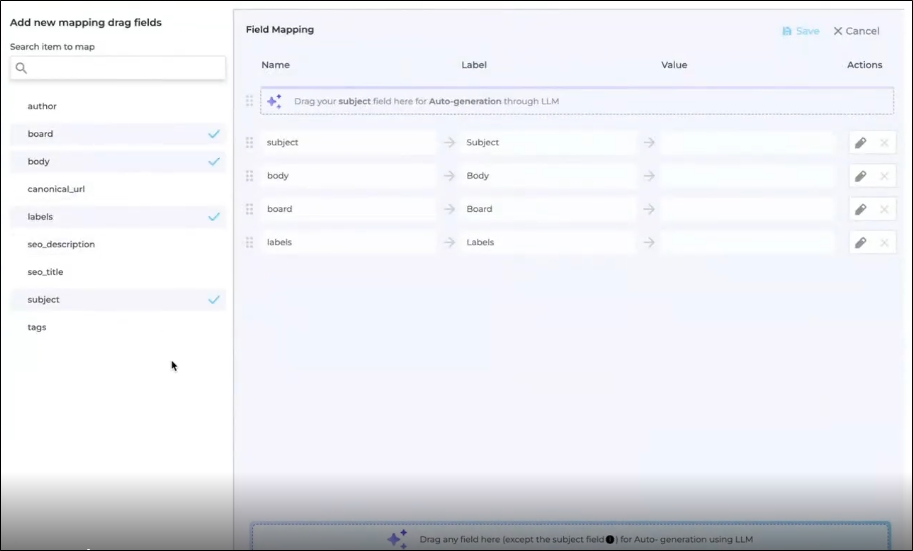
When you open a text field for editing, mainly the Subject and the Body fields; a dialog opens up where you can:
-
Select multiple case fields for mapping. The values stored in all the mapped case fields are copied to the mapped text case field.
-
Change field name for the support agents. This feature is useful when the agents are used to an in-house terminology for some sections. For example, they may use "Description" instead of "Body."
-
Include the value in the field for Content Health Prediction. When an admin checks the field, then Convent Reviewers can see Content Health score.
The score is generated based on the data in the selected fields. To show Content Health Score to the agents working in FreshService, check Preview Article Content Health in Advanced Settings. For more information, see Configure Advanced Settings in Knowbler.
NOTE.
This option is always checked for the Subject field and cannot be unchecked.
-
Assign a Board and a Label to the Field. The structure of a knowledge article in Khoros is: Categories > Boards > Templates > Label. Each article template has to have a board and a label and a template can only be in one board. Select the board and the label for your template here. For this configuration to work you have to Knowbler in FreshService. Please consult the doc Configure Knowbler in FreshService
<image>
The content displayed in the article text fields can be auto-generated if LLMs are connected and activated.
-
To autogenerate a knowledge article title, map the case Subject field to "Drag your Title field here for Auto-generation through LLM".
-
To autogenerate a knowledge article description, map the body or description field to "Drag any field here (except the title field) for Auto- generation using LLM".
<image>
The auto-generation screen is identical to the mapping screen for text fields, except the following two changes:
-
You can use up to five fields whose values will be used to auto-generate a description.
<image>
-
You can use sectioning to break the generated content into multiple parts, rather than displaying it as a single block of text. In the next image, two sections have been created: Root Cause and Steps to Resolve.
<image>
The instructions in the image above will generate a text divided into two sections:
-
In the first part, there will be the root cause of the issue. The "Root Cause" is for the end users who will see this section name. The text in curly brackets, {{root_cause}}, is for the LLMs. The users won't see the text in the curly brackets. Instead, the text in the curly brackets is replaced by the reason for that case.
-
In the second part there will be steps to resolve the issue. The “Step to Resolve" is for the end users who will see this section name. The text in curly brackets, {{steps_to_resolve}}, is for the LLMs. The users won't see the text in the curly brackets. Instead, the text in the curly brackets is replaced by the resolution for that case.
To create a section in curly brackets, click on the plus (+) icon after writing a headline.
<image>
-
All the auto-generated fields are highlighted in blue.
<image>
Click Save to save the mapping.
<image>
Click Complete to apply the changes.
<image>