Knowbler-Zendesk: Configuration in Zendesk
Support teams can use Knowbler to generate Zendesk knowledge articles. Creating an article with Knowbleris much faster than starting from scratch. Configuring Knowbler in Zendesk involves making knowledge creation easier through either mapping or auto-generation.
The image given below shows what happens when a case subject is mapped to an article title. The case subject is used as the article title, which an agent can edit. Editing a title is easier than creating a new one.
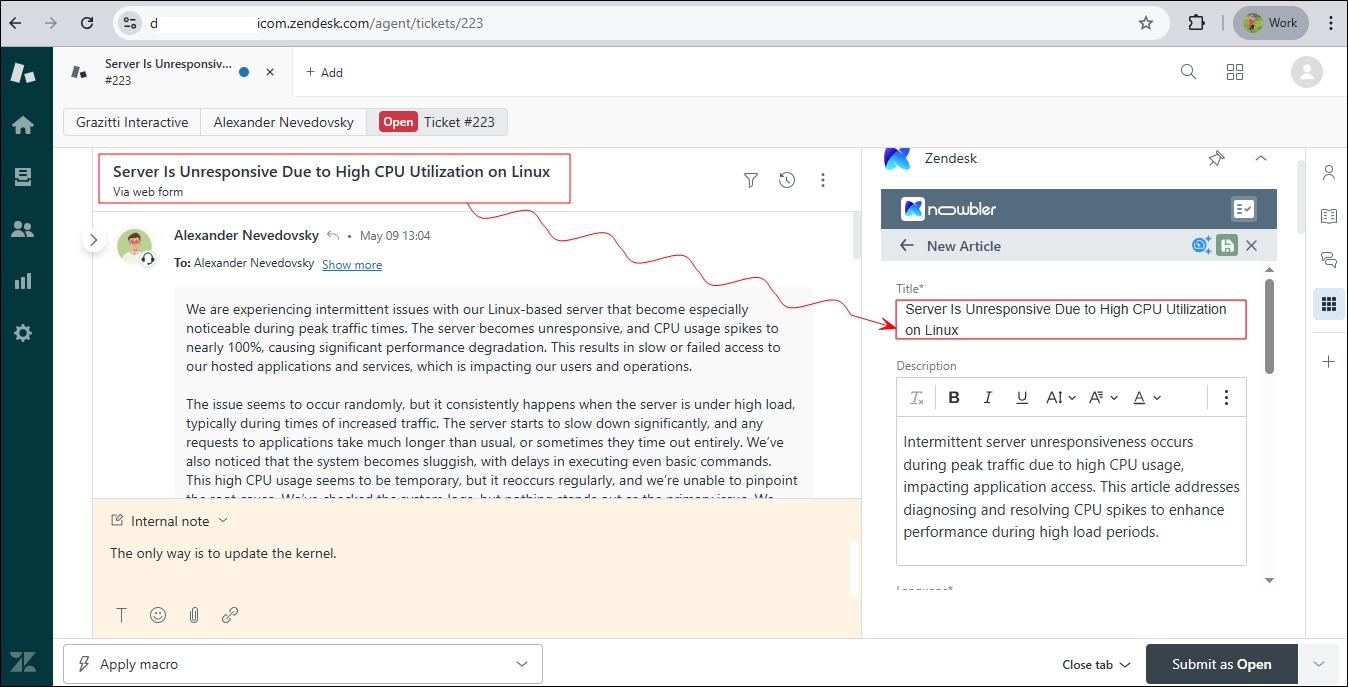
Fig. A snapshot of Knowbler autofilling the title field in Zendesk.
The default Zendesk Guide article template comes with pre-mapped fields.
When an agent launches Knowbler to create a Zendesk Guide article, they see an article template with data pre-populated into the mapped fields from the opened case.
Add Connection(s)
Knowbler's password management system simplifies authorization by storing the passwords associated with your Zendesk role. You can use these stored passwords to install on multiple Zendesk instances. We recommend using this system instead of taking a detour when configuring Zendesk, so let's add a Connection first.
-
Log into Knowbler.
-
Expand Administration, open Connections, and click Add Connection.
-
Select "Zendesk" from Choose Your Platform.
-
In the Connection name, enter a descriptive label. These labels help you distinguish passwords from one another when you have stored several of them.
-
In the Client URL field, enter the web address of your Zendesk instance.
-
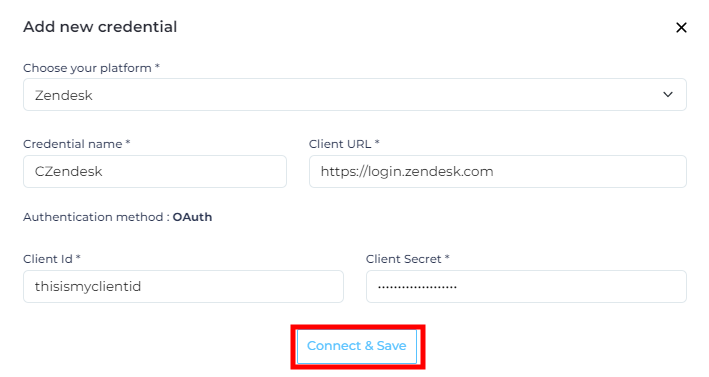
Enter the Zendesk Client ID and Client Secret.
-
Click Connect & Save.
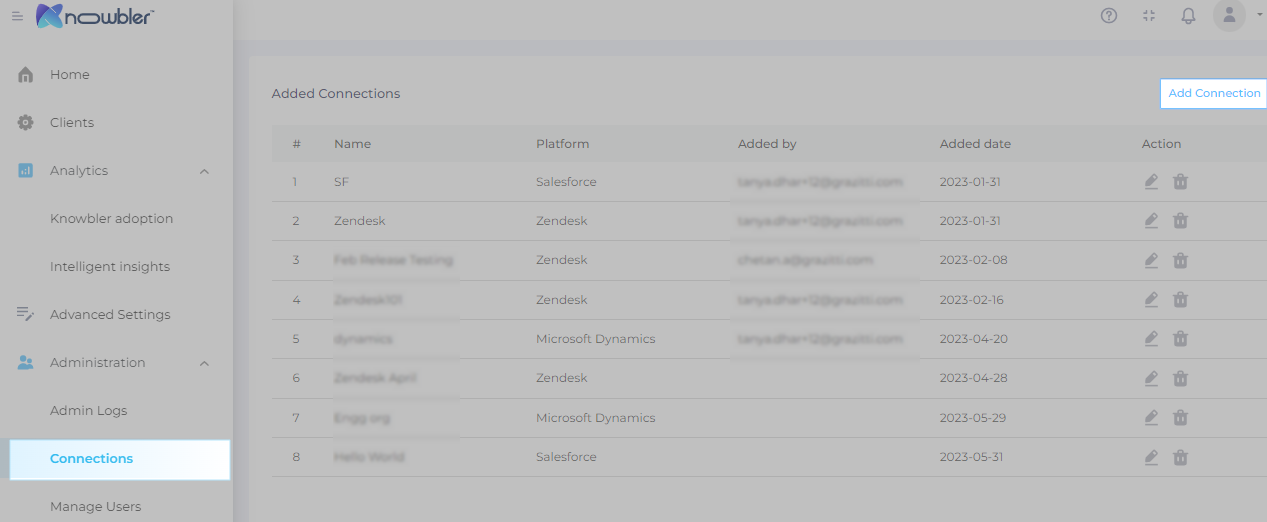
If the authentication is successful, the connection will be visible in the Added Connections list.
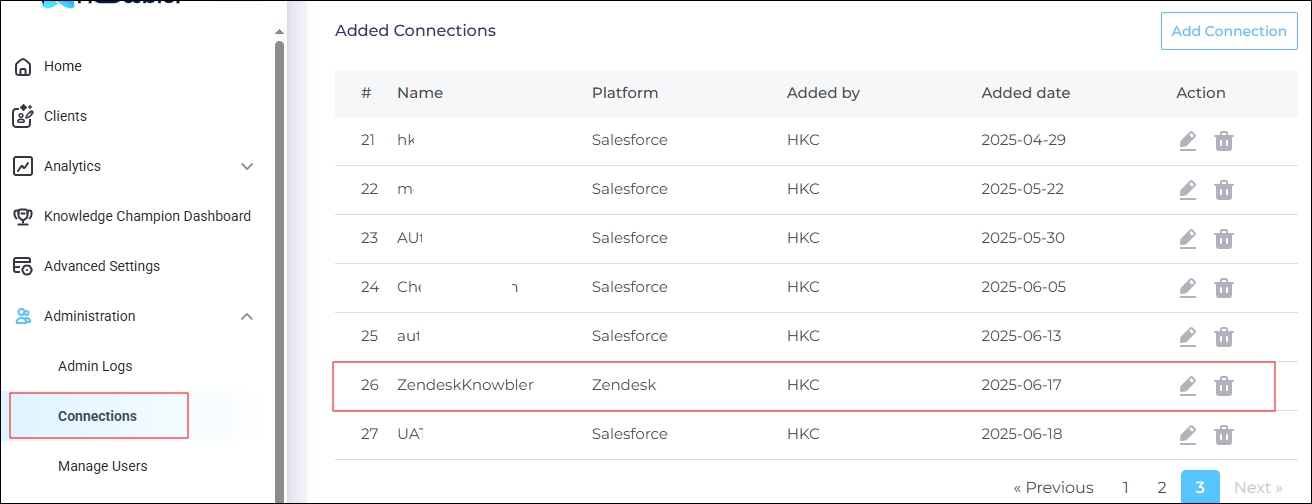
Fig. Snapshot of an added Zendesk connection.
If the credentials for your instance change, use the edit function to reauthenticate.
To delete a Connection, click ![]() .
.
NOTE:
Editing impacts mapping. If you have edited a Connection, don't forget to review mapping.
Configure Knowbler for Zendesk
A Service Desk Management Tool is where support agents work and a Knowledge Management Tool is where support articles are published. Zendesk fulfills both functions.
-
Log into Knowbler.
-
Go to Clients, and click Add Client.
NOTE. First time users can click Get Started.

-
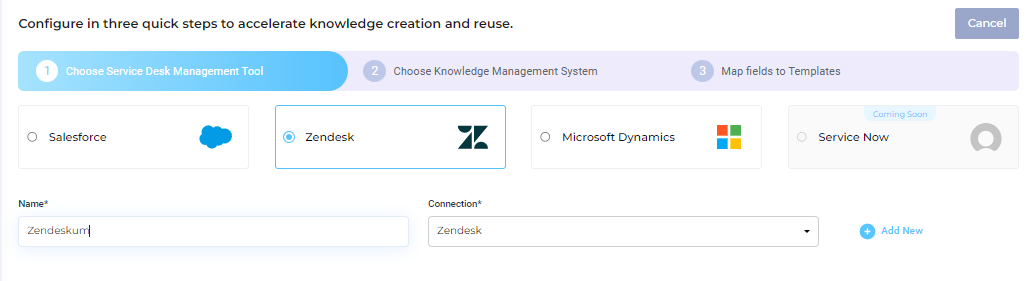
Select Zendesk.
-
Each client has a unique label. Please provide a label for your installation in the Name field.
-
Select a Connection from the Connections dropdown. If you haven't linked Zendesk to Knowbler yet, click Add New and follow the instructions in the previous section Add Connection(s)
-
Click Next.
-
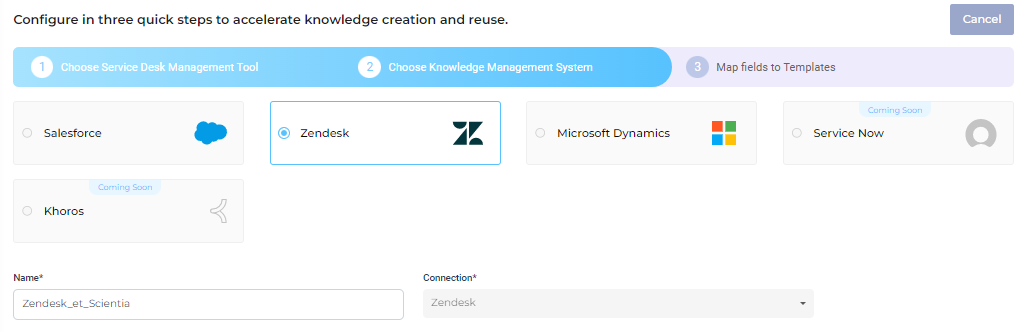
Give your Knowledge Management System a label in the Name field and click Next.
The Mapping Screen is displayed. There are two configurations:
-
Article Sharing Settings
-
Field Mapping
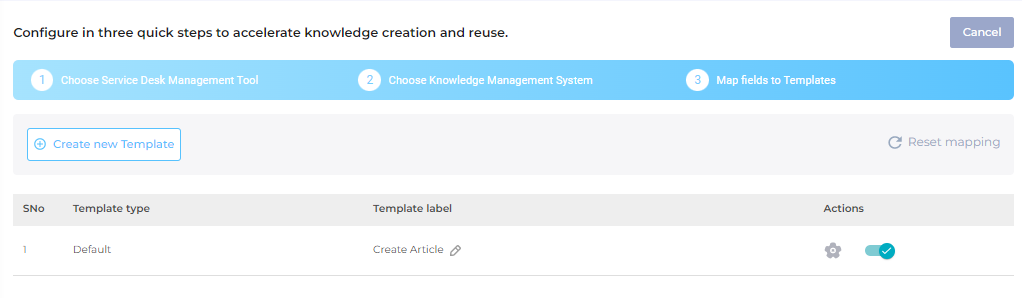
Fig. A snapshot of the Map Fields to Template screen.
Article Sharing Settings
When no changes are made in Article Sharing Settings, the Zendesk knowledge articles have public URLs in the following format:
Default URL Format:
https://{{company_name}}.zendesk.com//hc/articles/{{article_id_and_title}}
Example:
https://yourcompany.zendesk.com//hc/articles/39124093620253-this-is-a-title
Using Article Sharing Settings, the admins can change the public URLs. In the next image, the Author ID field has been used to create a public URL.
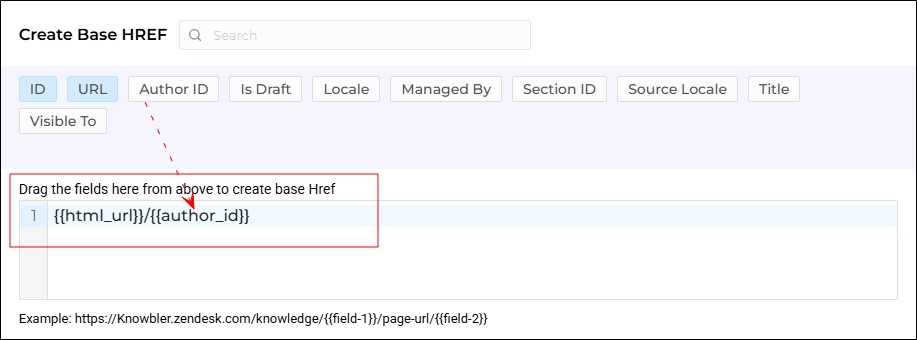
Fig. A snapshot of the custom URL for Zendesk knowledge article.
As a result, the knowledge article links are in the following format now:
Updated URL Format:
https://yourcompany.zendesk.com//hc/{{language_code}}/articles/{{article_id_and_title}}/{{author_id}}

Example:
https://yourcompany.zendesk.com//hc/en-us/articles/28214093620253-this-is-an-article/1908285650673
To start, click Article Sharing Settings.
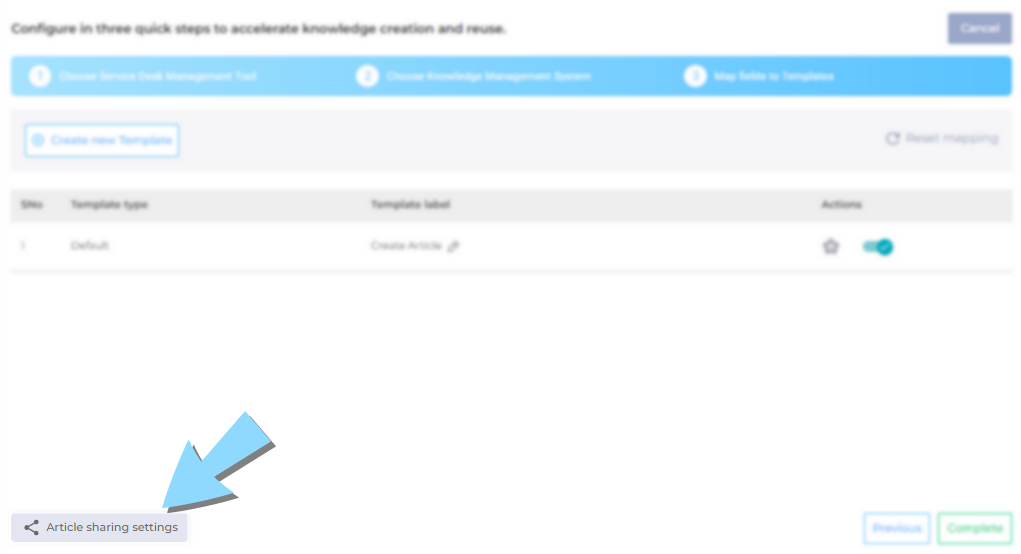
Fig. A snapshot of “Article Sharing Settings” on “Map Fields to Templates” screen.
The first configuration is Create Base HREF, which displays all the article fields in the gray box. Drag and drop them to the white box below to create a public URL. Insert a forward slash between each field. For example, {{field_one}}/{{field_two}} and so on.
The first and mandatory field is always the URL. Without it, the public link sharing will not work.
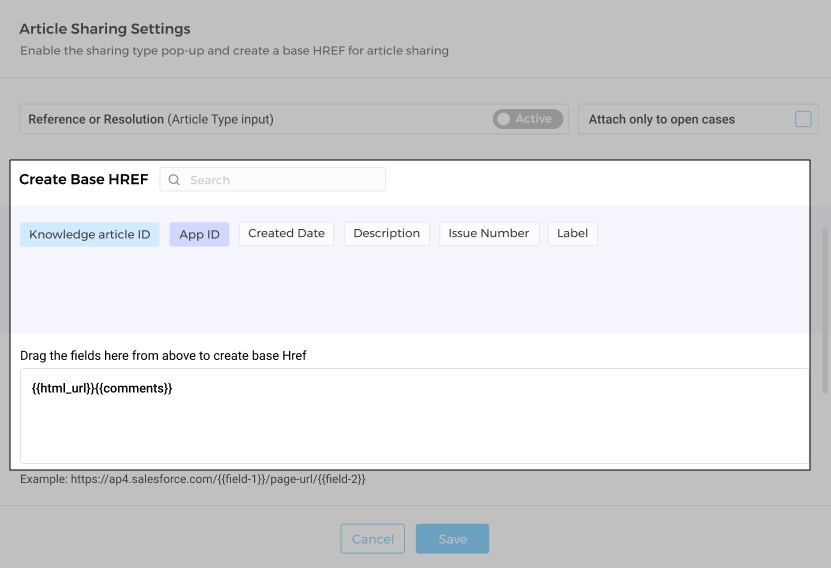
Fig. Snapshot of a custom URL for knowledge articles in Zendesk in the Article Sharing Settings.
The last setting is Reference or Resolution (Article Type Input). By default, it is inactive. When you enable it, agents composing articles in Knowbler will see a pop-up each time they share an article. The pop-up will ask if the article is a reference or a resolution.
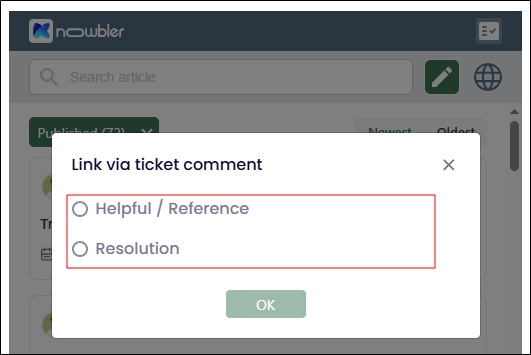
Fig. A snapshot of the dialog that is shown to the agents in Zendesk if the Reference or Resolution (Article Type Input) setting is enabled.
Enabling Reference or Resolution (Article Type Input) setting is not required.
Click Save.
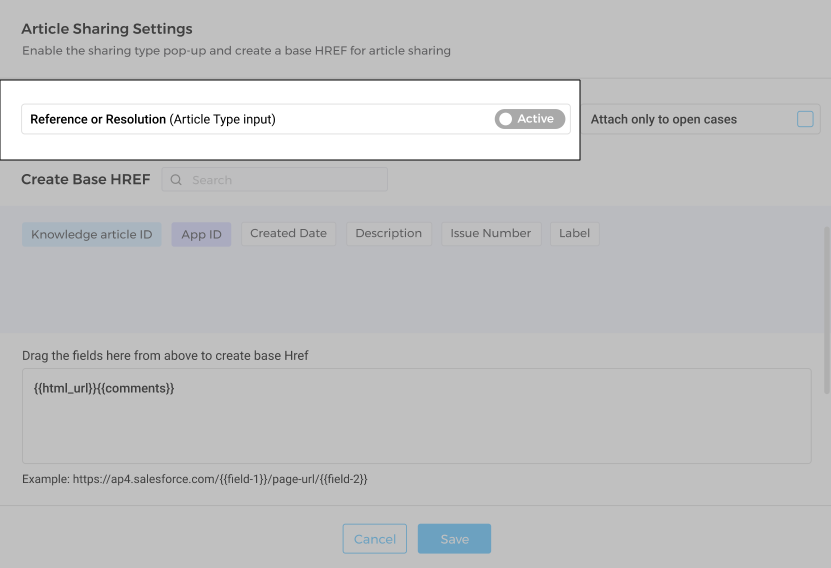
Fig. A snapshot of the checked “Mark as Reference or Resolution” dialog.
Map Fields
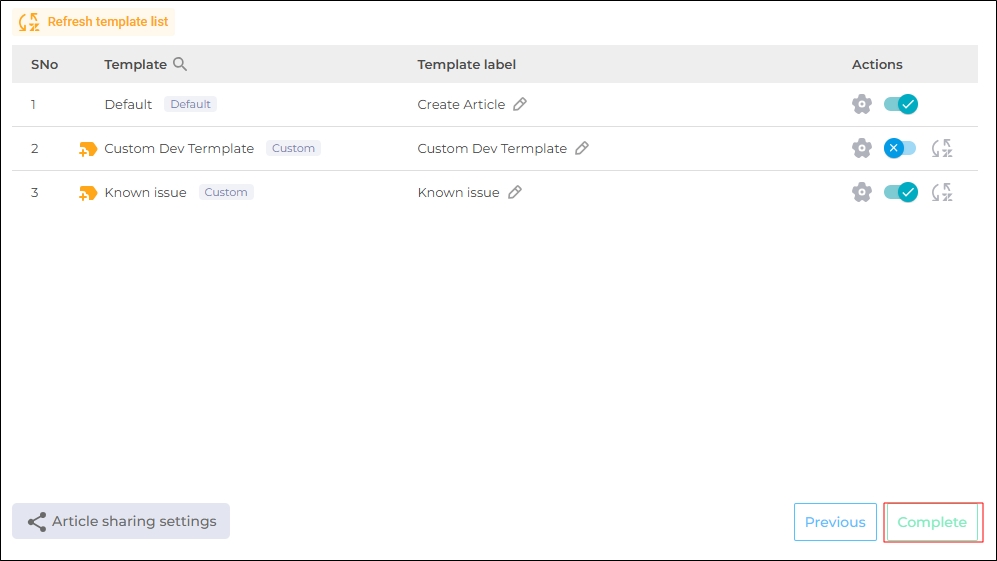
The article templates in Zendesk are reflected on the Map Fields screen. If you have added or deleted a template in Zendesk, click Refresh Template List to view the latest list. The button refreshes the templates list. You can map fields in all the templates, or in only a few of them. To deactivate a template, use the toggle in the Actions column.
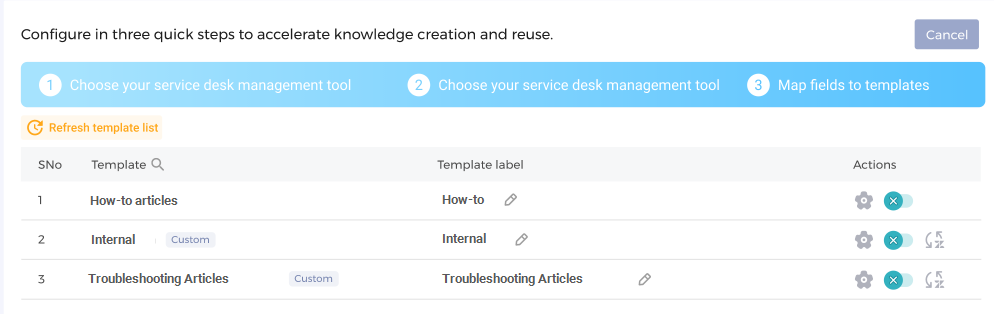
Fig. A Knowbler configuration screen with an active and two inactive templates.
The activated templates are shown to the agents when they are creating knowledge articles in Zendesk.
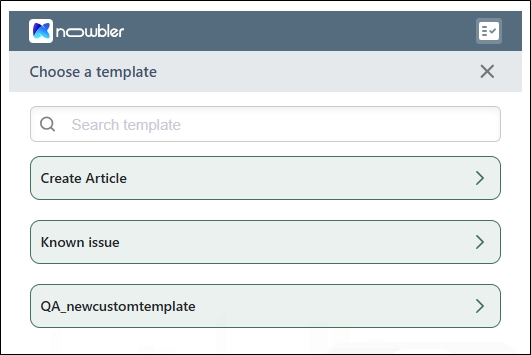
Fig. A Knowbler app in Zendesk with three active templates.
To open a template for editing, click in the Actions column.
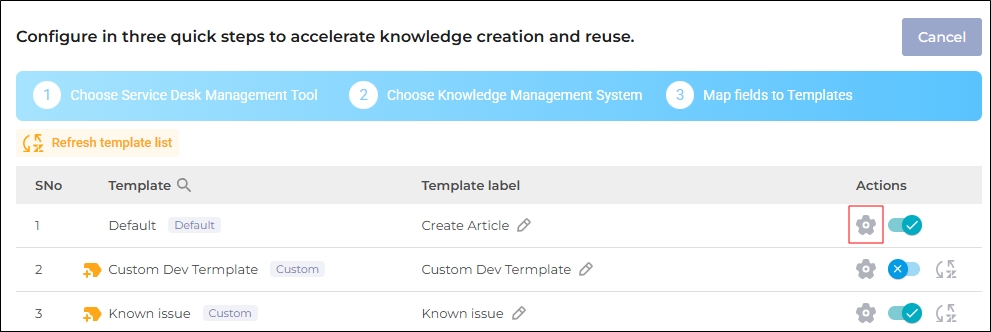
Fig. A snapshot of the Edit-a-Template button.
All the mapped fields are displayed. You cannot remove mandatory fields. The custom fields can be removed, but they cannot be mapped.
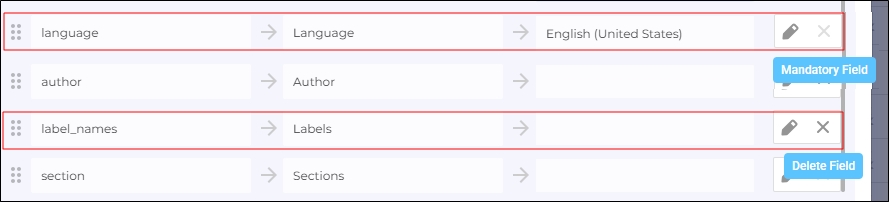
Fig. A mapping screen with a mandatory field (language) and custom field (label_names).
When you open a text field for editing, mainly the Title and the Description fields; a dialog opens up where you can:
-
Select multiple case fields for mapping. The values stored in all the mapped case fields are copied to the mapped text case field.
-
Change field name for the support agents. This feature is useful when the agents are used to an in-house terminology for some sections. For example, they may use "Description" instead of "Body."
-
Include the value in the field for Content Health Prediction. When an admin checks the field, then Convent Reviewers can see Content Health score.
The score is generated based on the data in the selected fields.To show Content Health Score to the agents working in Zendesk, check Preview Article Content Health in Advanced Settings. For more information, see Configure Advanced Settings in Knowbler.
NOTE.
This option is always checked for the Title field and cannot be unchecked.
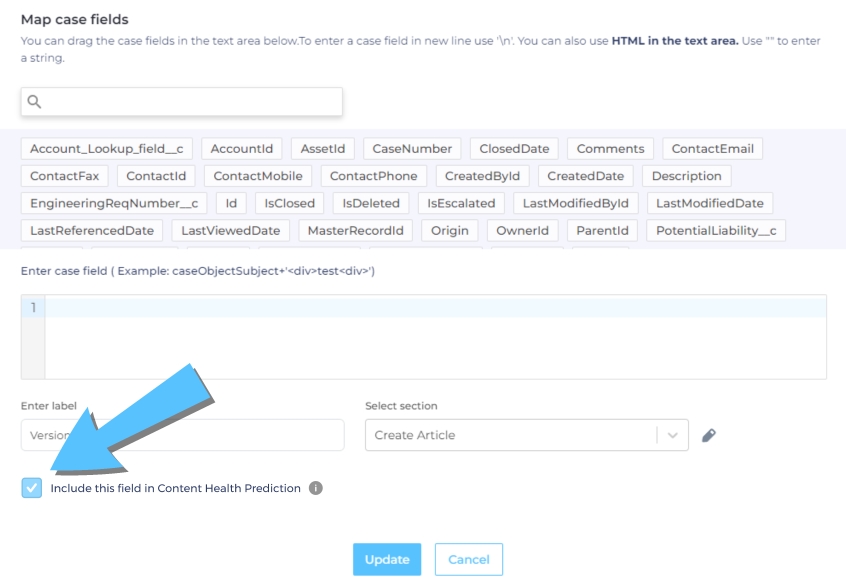
Fig. A map case field screen for the Description field.
The content displayed in the article text fields can be auto-generated if LLMs are connected and activated.
-
To autogenerate a knowledge article title, map the case Title field to "Drag your Title field here for Auto-generation through LLM".
-
To autogenerate a knowledge article description, map the body or description field to "Drag any field here (except the title field) for Auto- generation using LLM".
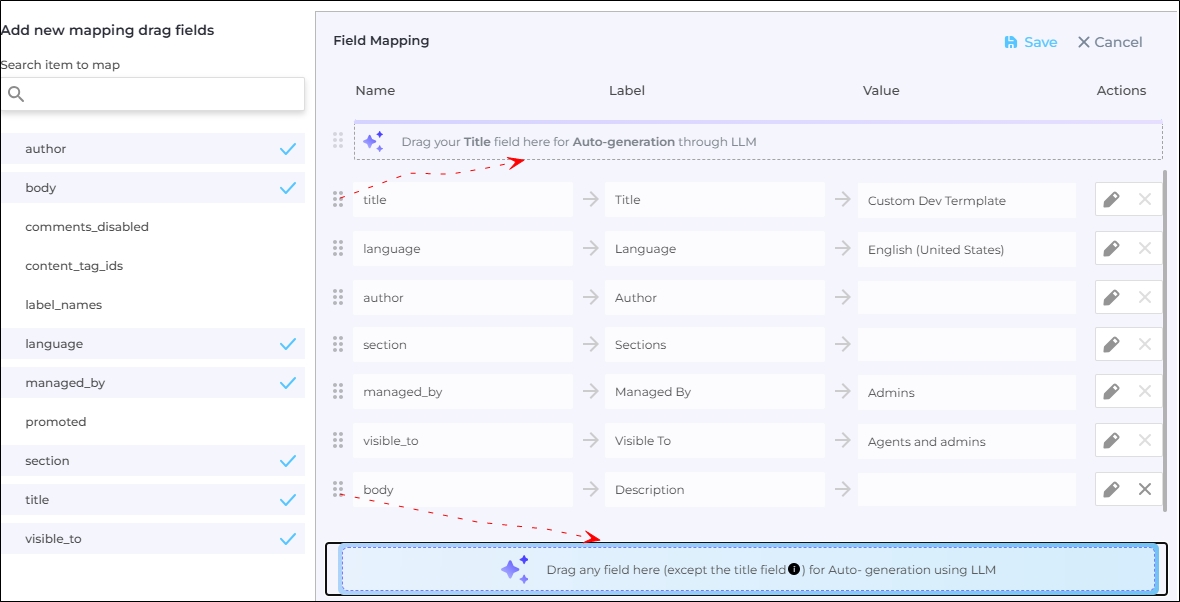
Fig. Snapshot displaying where the Title and Body fields should be dragged for auto-generation.
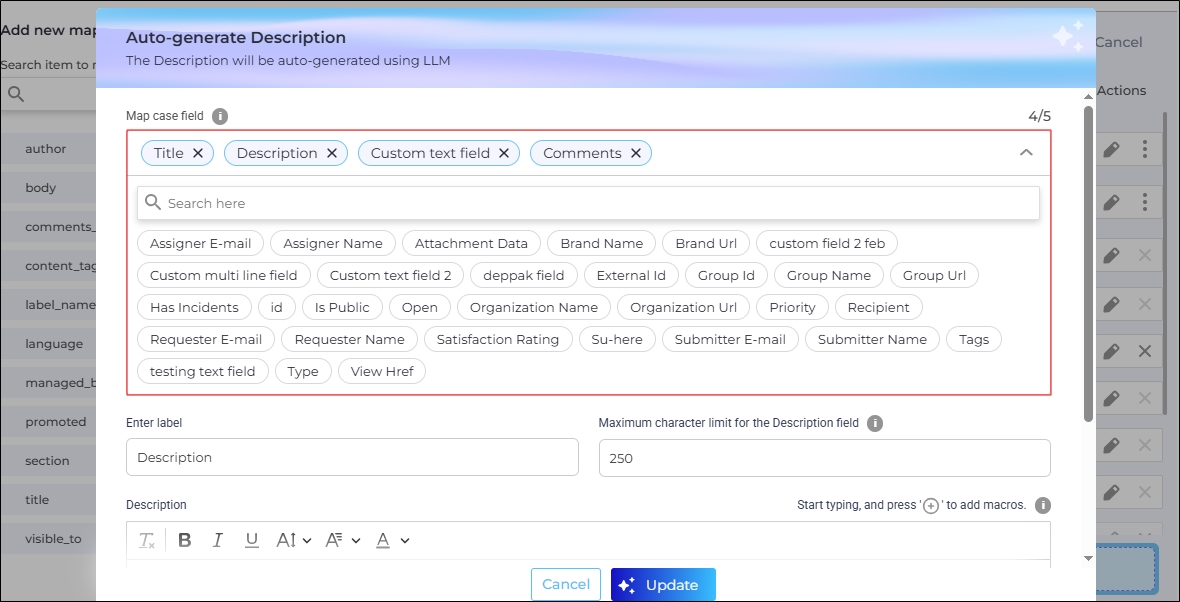
The auto-generation screen is identical to the mapping screen for text fields, except the following two changes:
-
You can use up to five fields whose values will be used to auto-generate a description.
-
You can use sectioning to break the generated content into multiple parts, rather than displaying it as a single block of text. In the next image, two sections have been created: Root Cause and Steps to Resolve.
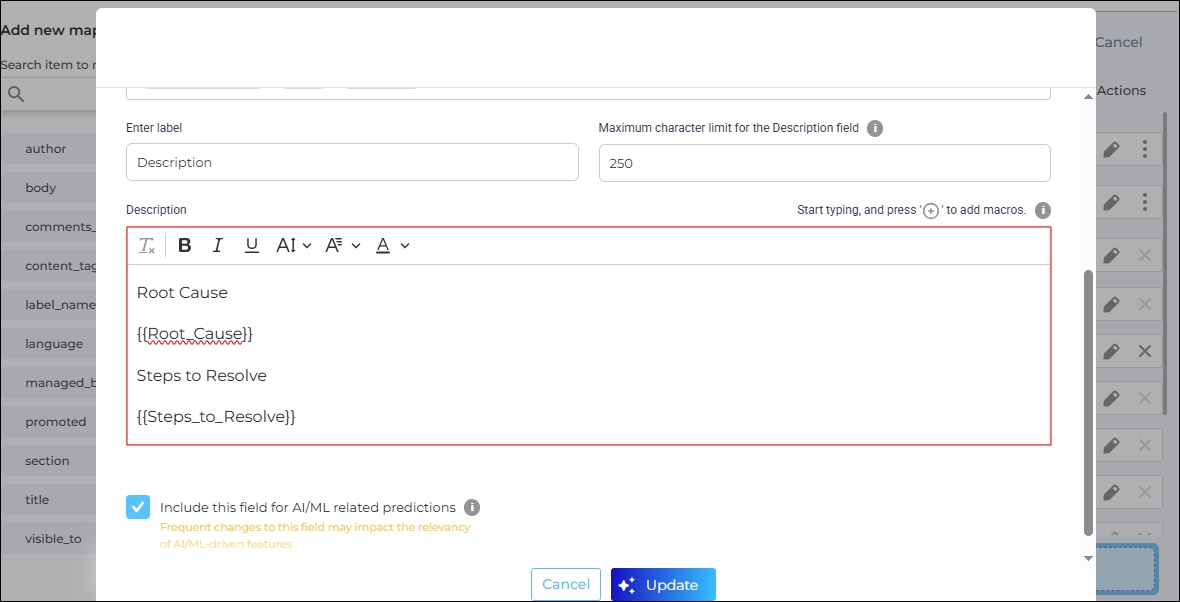
The instructions in the image above will generate a text divided into two sections:
-
In the first part, there will be the root cause of the issue. The "Root Cause" is for the end users who will see this section name. The text in curly brackets, {{root_cause}}, is for the LLMs. The users won't see the text in the curly brackets. Instead, the text in the curly brackets is replaced by the reason for that case.
-
In the second part there will be steps to resolve the issue. The “Step to Resolve" is for the end users who will see this section name. The text in curly brackets, {{steps_to_resolve}}, is for the LLMs. The users won't see the text in the curly brackets. Instead, the text in the curly brackets is replaced by the resolution for that case.
To create a section in curly brackets, click on the plus (+) icon after writing a headline.
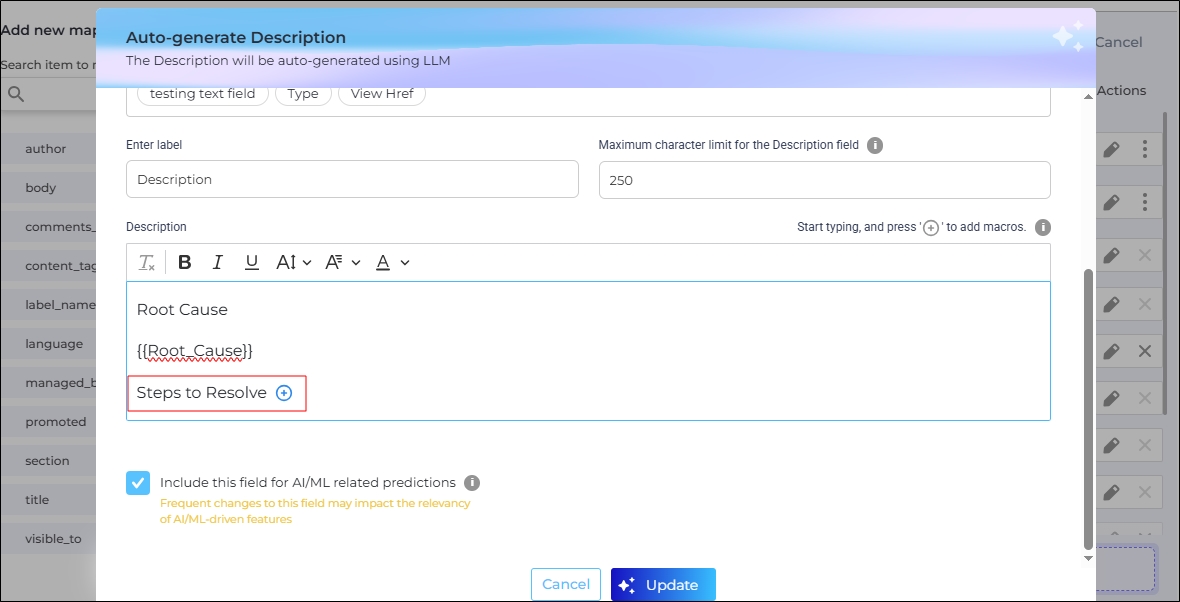
Fig. A snapshot of the sectioning feature in Knowbler for Zendesk.
-
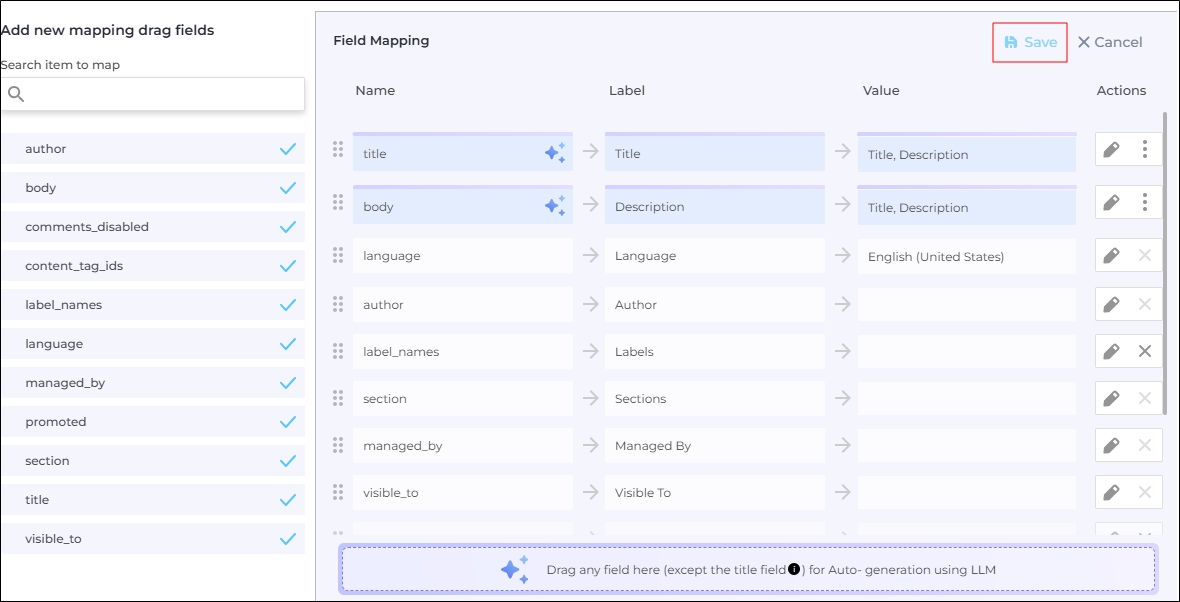
All the auto-generated fields are highlighted in blue.
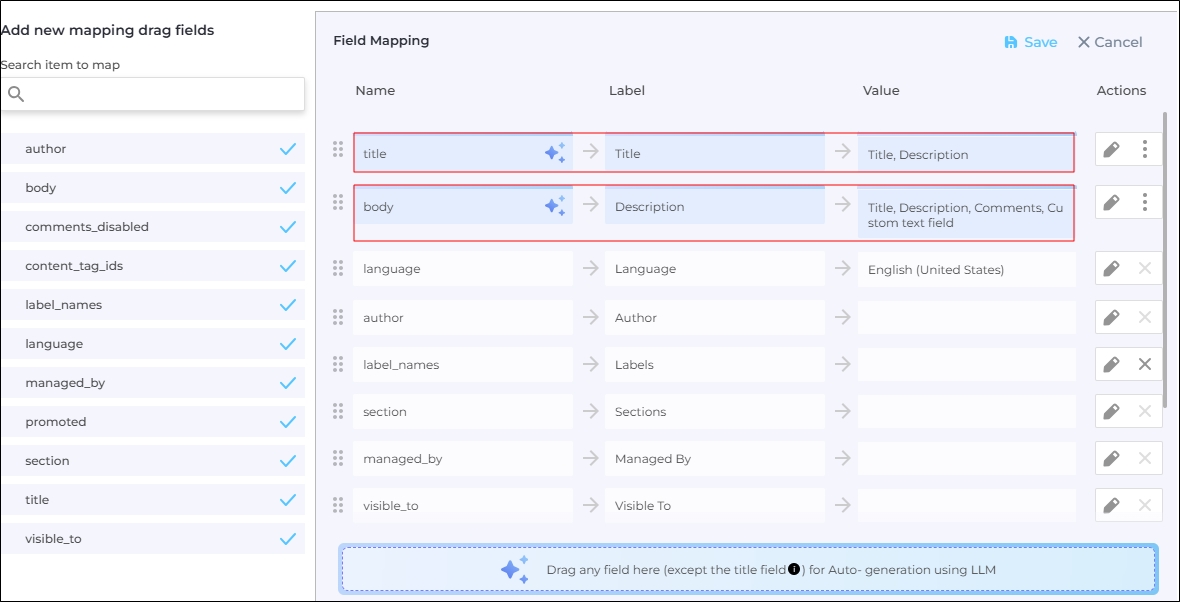
Fig. A snapshot of two fields marked for auto-generation.
Click Save to save the mapping.
Click Complete to apply the changes.
Configure Knowbler in Zendesk
To start, download the Knowbler app created for Zendesk from Configuration.
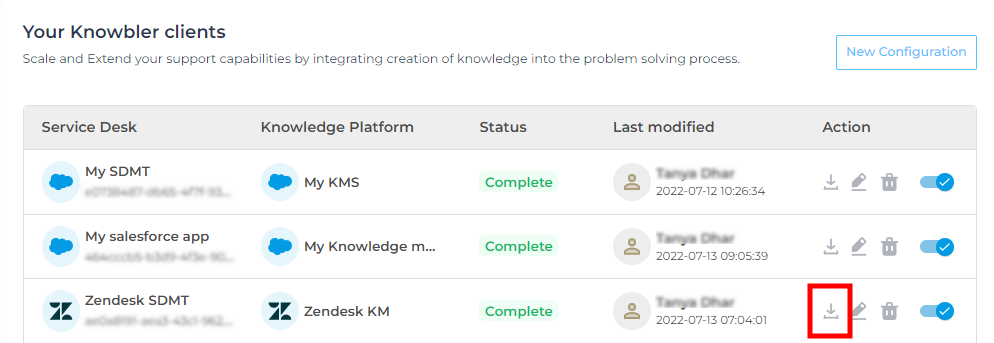
Fig. A snapshot of the download button.
-
Log into Zendesk as an admin.
-
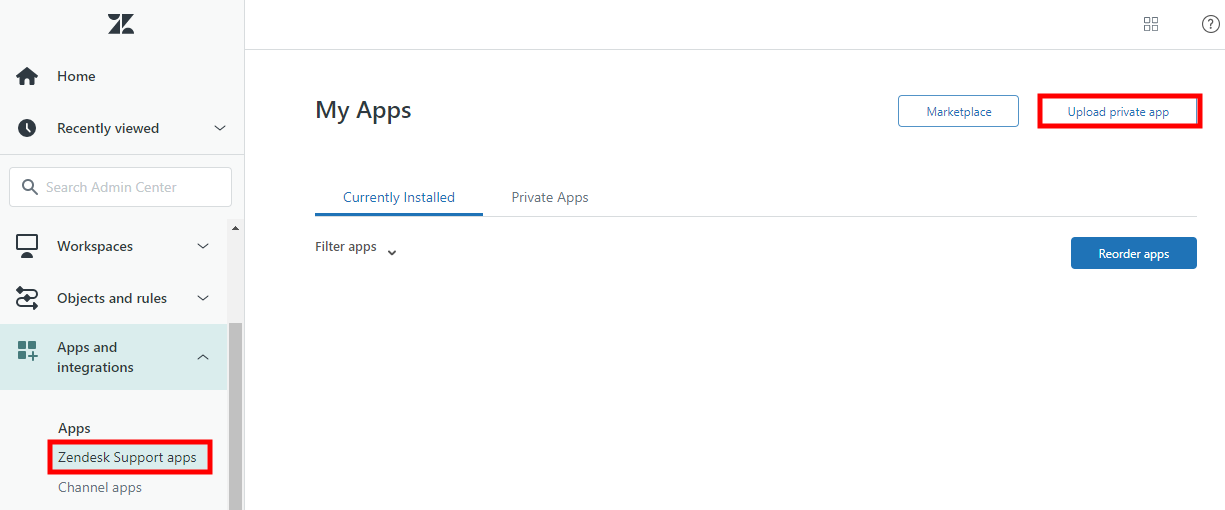
Navigate to Apps and integrations > Apps > Zendesk Support apps and click Upload private app.
-
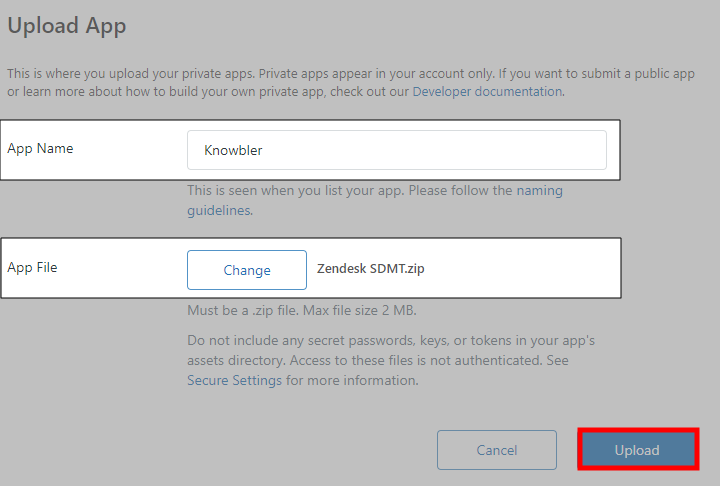
Enter a label in App Name and upload the zip file using App File > Choose File.
-
Click Upload.
-
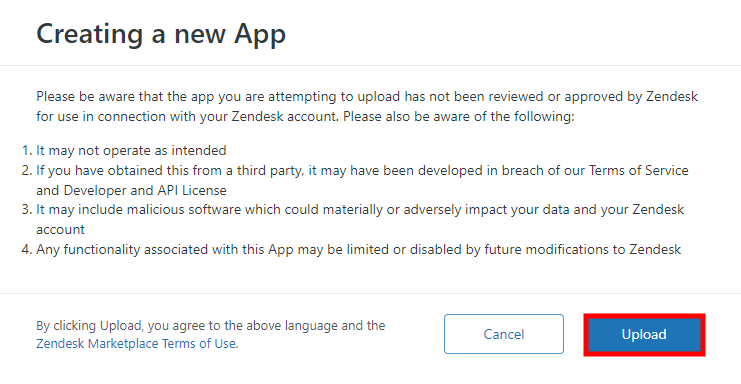
When a warning appears asking you to confirm the upload, click Upload.
-
On the new dialog, click Install. (Setting up Role and Group restrictions is optional.)
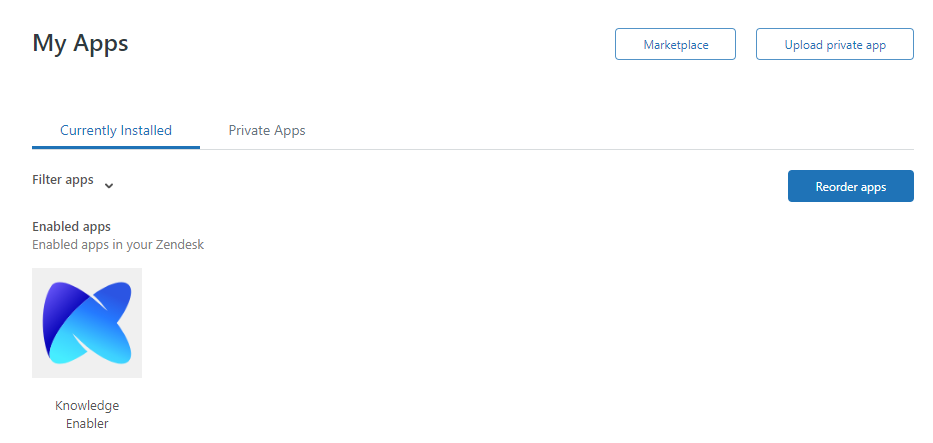
-
You can now spot Knowbler in the Currently Installed section.